Setting up and managing Ledgers
When onboarding to Midaz, follow these key steps to establish a solid foundation for your financial infrastructure:
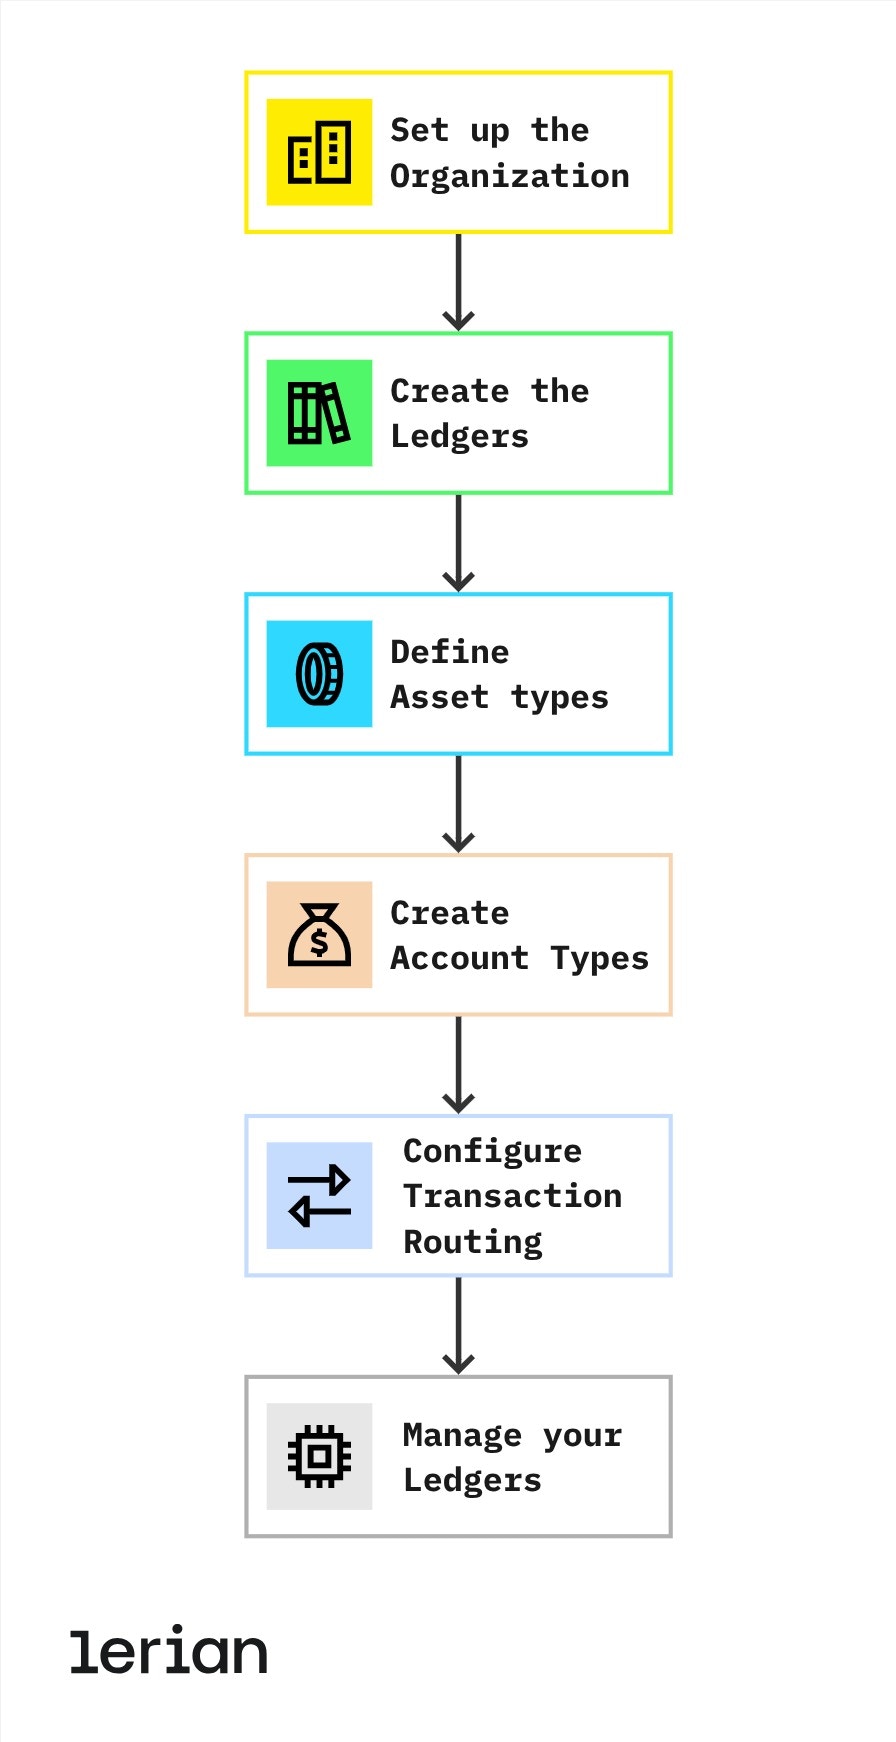
Figure 1. Workflow for setting up and managing ledgers.
Step 1: Set up the Organization
Your organization in Midaz represents your bank or business entity. If it hasn’t been created yet, set it up via the Console or API. Ensure that all core details, such as legal name and identifiers, are accurate, as this context will underpin all ledger operations.Step 2: Create the Ledgers
Create a Ledger under your organization to hold financial records. It’s common to start with a primary ledger for all customer-facing operations (e.g., “Main Banking Ledger”). Initially, it will contain no accounts, but serves as the base layer for all financial activity.Step 3: Define Asset types
Register the assets your ledger will support—this can include currencies (e.g., BRL, USD), points, or even crypto tokens. These assets will be used throughout your account and transaction configuration. Assets can be extended as your product portfolio evolves.Step 4: Create Account Types
If you plan to enforce account classification rules, define your Account Types. These represent structured categories (e.g.,user_wallet, treasury, revenue) that can later be referenced during account creation or transaction validation.
Account Types are optional by default, but when enabled, they become required during account creation to ensure classification consistency across your ledger.
keyValue, which must be unique and alphanumeric (dashes and underscores allowed). These identifiers will be used in validation flows and transaction routes.
Step 5: Configure Transaction Routing
Use Operation Routes and Transaction Routes to define and enforce structured validation for your transactions.- Start by creating the Operation Routes, which validate each leg of the transaction individually (e.g., the debit must come from an account of type
user_wallet, and the credit must go to the alias@external/BRL). - Then, create the Transaction Route, combining the individual operation routes into a complete flow (e.g., a cashout transaction with specific debit and credit validations).
Step 6: Manage your Ledgers
Keep your ledgers clean and scalable with the following best practices:- Use Midaz’s RBAC system to assign permissions and control access per ledger.
- Plan for separate ledgers when needed (e.g., “Testing”, “Internal”, “Multi-entity”), and document ownership.
- Periodically review and reconcile ledger data, especially when integrating with external settlement systems.
- Midaz enforces double-entry logic, so every movement is fully traceable—no manual balance changes.
Configuring Accounts, Portfolios, and Segments
This section helps you structure customer data and product entitlements in Midaz.
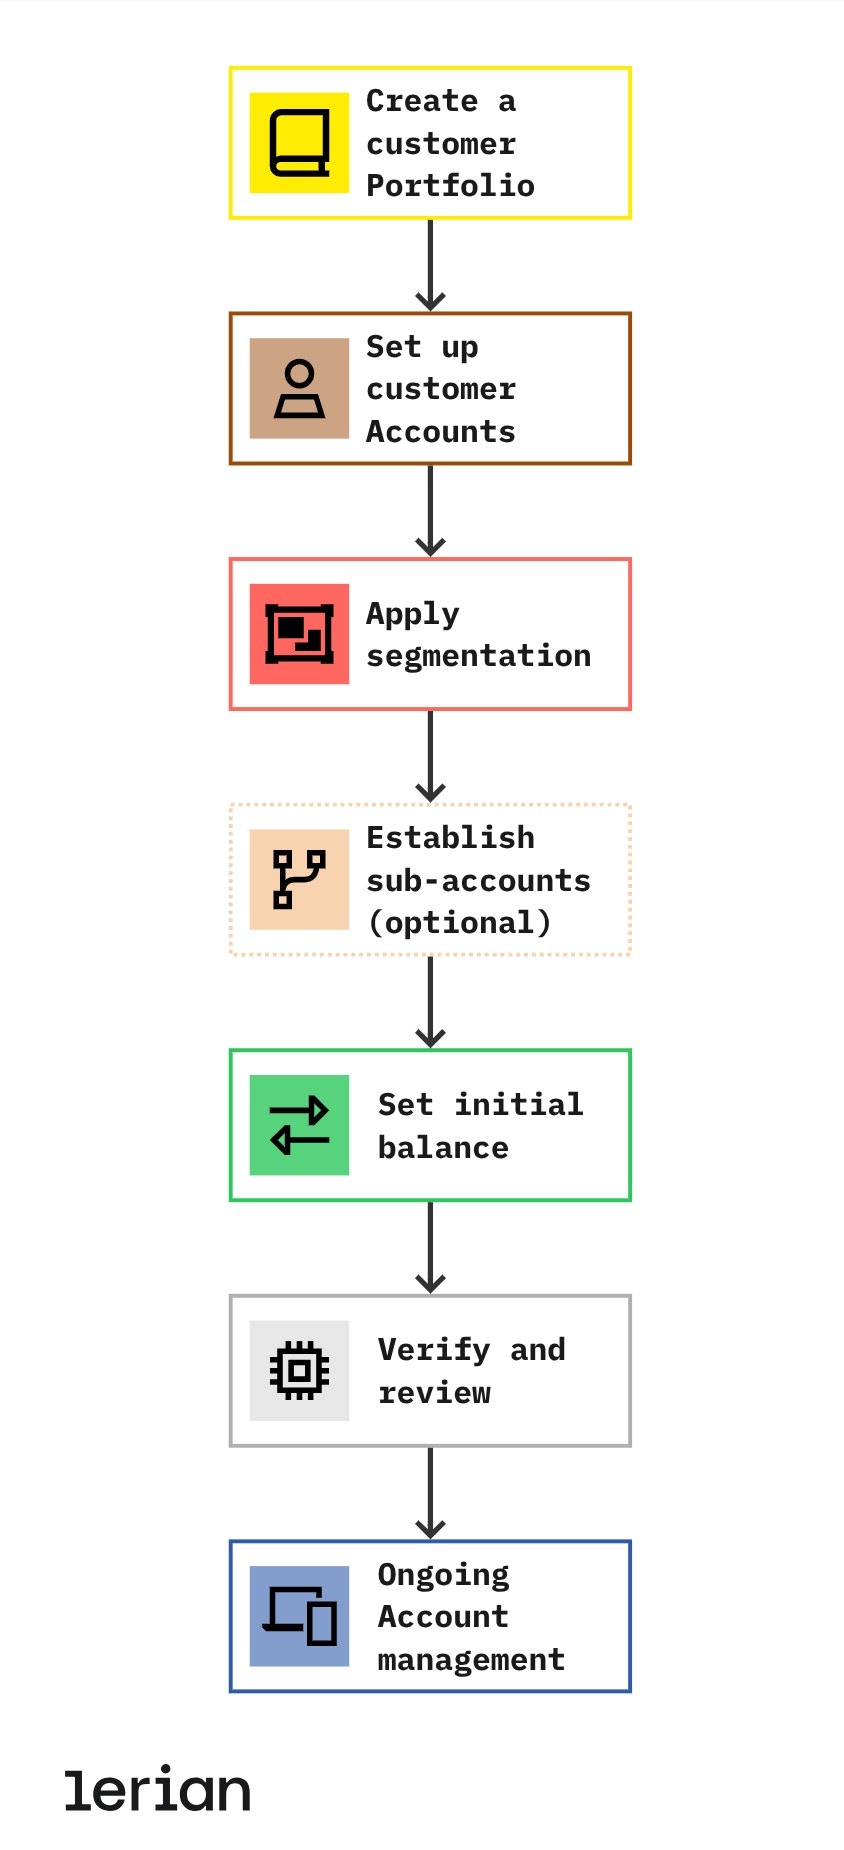
Figure 2. Workflow for configuring Accounts, Portfolios, and Segments.
Step 1: Create a customer Portfolio
Start by creating a Portfolio for each new customer. Portfolios act as the logical containers for accounts. Link each portfolio to your CRM or internal system via metadata (e.g., Entity ID).Step 2: Set up customer Accounts
Each financial product or asset the customer holds becomes a separate Account under their portfolio.- A checking account in BRL and a savings account in USD are separate accounts.
- If Account Types are enabled, the
typefield becomes mandatory and must match one of the pre-registered values. - Use account aliases to simplify downstream operations.
Step 3: Apply segmentation
Use Segments to categorize portfolios or accounts (e.g.,standard, vip, enterprise). These tags allow for dynamic logic (e.g., fee exemptions, tiered interest) based on customer segmentation.
Step 4: Establish sub-accounts (optional)
For organizations or specialized cases, you can configure sub-accounts. Use clear naming conventions to maintain traceability (e.g., “Acme USD - Payroll”).Step 5: Set the initial balance
Use the Transactions API to inject the opening balance. This ensures traceability and double-entry compliance:- Debit the funding source.
- Credit the new account.
- Do not manually update balances—Midaz tracks every value via transactions.
Step 6: Verify and review
Before proceeding with operations:- Confirm accounts were created with the correct assets and types.
- Validate account balances.
- Check if segmentation has been applied.
- Confirm setup via API or the Console.
Step 7: Ongoing Account management
Maintain system integrity by managing lifecycle operations via API or Console:- Update account details as needed.
- Close accounts only once the balance reaches zero.
- Reclassify portfolios/accounts if segmentation changes.
Implementing double-entry transaction management
Midaz guarantees ledger integrity through strict enforcement of double-entry logic. Every transaction must contain at least one debit and one credit operation.
Figure 3. Workflow for implementing double-entry transaction management
Step 1: Structure the transaction
Begin by structuring your Transaction object:- Once your Transaction Route is configured, insert its ID into the
routefield of your transaction payload. - Define the source and destination accounts, including asset and value details.
- Add descriptive metadata to ensure traceability and clarity.
Step 2: Choose your integration method
You can define transactions via:- Transaction DSL (Gold Language) – a human-readable syntax for quick prototyping.
- Transactions API – for full control and programmatic execution.
Step 3: Enforce double-entry validation
Midaz automatically verifies that the sum of credits matches the sum of debits. Mismatches or structural violations will reject the transaction at submission.Step 4: Implement idempotency
Use idempotency keys to prevent duplicates from network retries. Midaz will recognize repeated keys and avoid duplicate processing.Step 5: Track and reconcile transactions
Use built-in tools to:- Track submitted and posted transactions.
- Audit metadata and timestamps.
- Reconcile transaction batches for compliance.
Step 6: Submit corrections via reversals
Rather than editing or deleting transactions, submit corrective entries. Every reversal is linked to its original via the transaction metadata for full traceability.Step 7: Optimize complex workflows
Use multi-operation transactions to:- Process interest accruals.
- Execute batched payouts.
- Handle conditional flows with routing logic.