This guide is for Enterprise Model users with access to Midaz and Access Manager. You’ll also see how to integrate optional plugins — Fees Engine, CRM, and Smart Templates — in the most effective order.
Getting started: Setup order
To ensure modularity and clean integrations, we recommend the following setup order: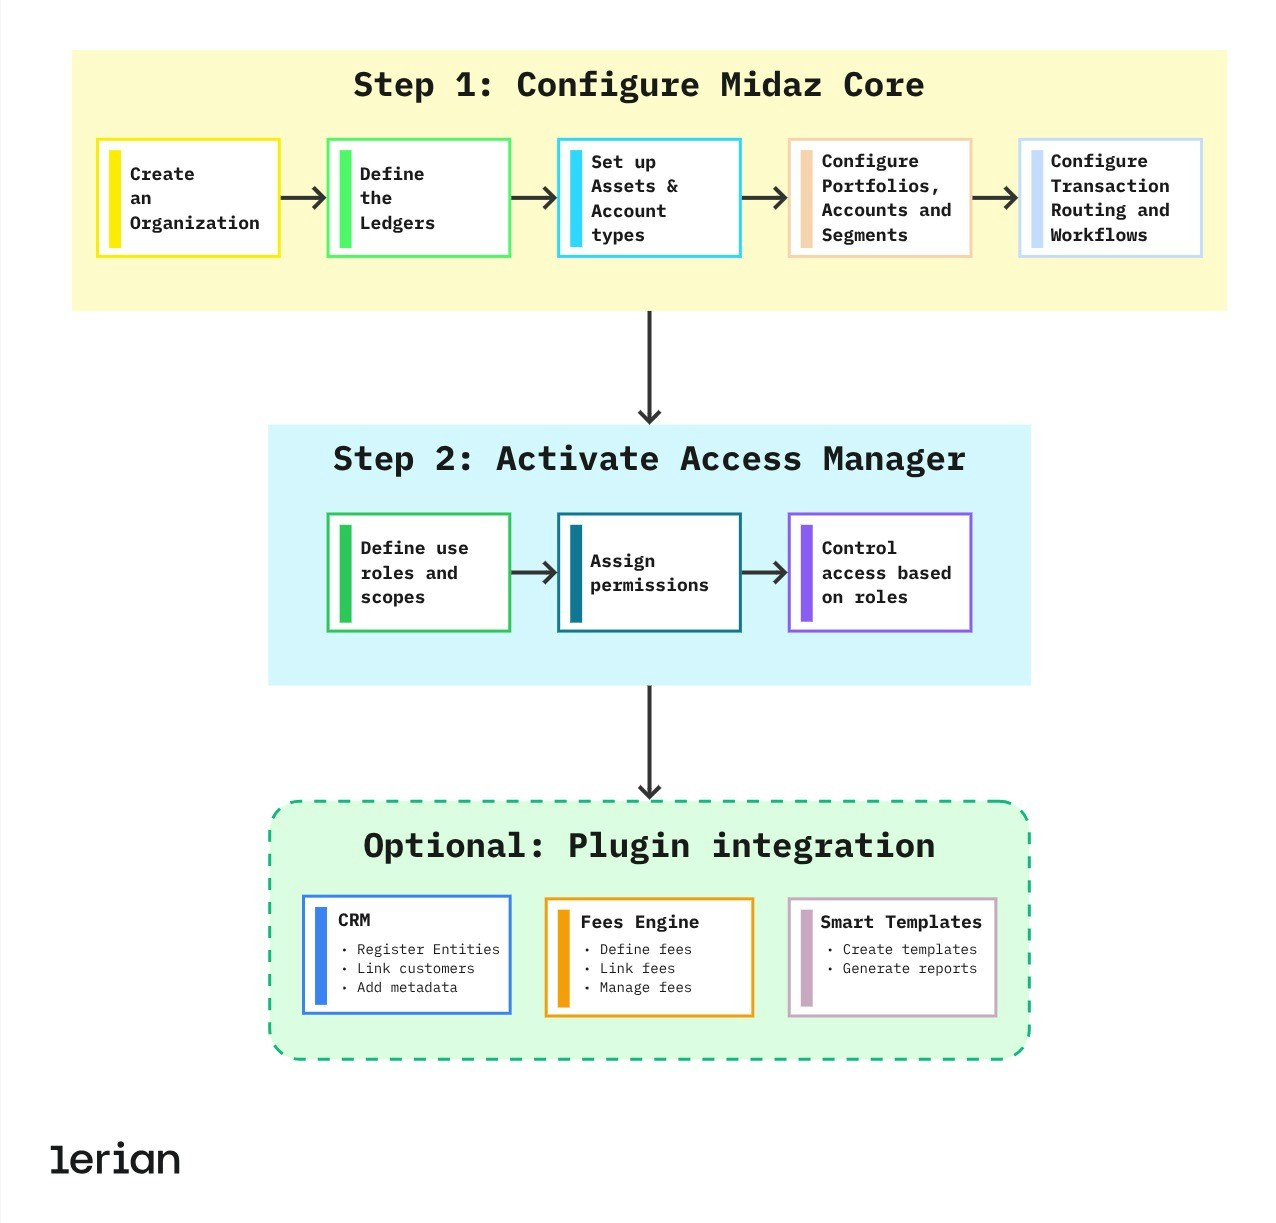
Figure 1. Enterprise Model setup order.
Step 1: Configure Midaz Core
Begin by following the steps in the Midaz recommended workflow. This includes:- Creating your Organization and Ledger(s).
- Defining assets and account types.
- Setting up portfolios, accounts, and segments.
- Configuring Transaction Routing for validation.
- Implementing transaction workflows (double-entry).
Step 2: Activate Access Manager
Access Manager centralizes authentication and role-based access control (RBAC) for Midaz and its plugins.- Define user roles and scopes.
- Assign permissions to API keys or users.
- Control access to operations based on roles.
Step 3: Integrate CRM
The CRM Plugin helps you map customer data to Midaz portfolios.- Register customers as
Holderobjects. - Create Aliases to link Holders to specific ledger accounts.
- Add metadata for compliance, segmentation, and insights.
Step 4: Configure Fees Engine
Use the Fees Engine to automate pricing and monetization rules across your operations.- Define fees and charge strategies (flat, tiered, dynamic).
- Attach fees to operations like transfers or withdrawals.
- Control when and how fees are calculated and charged.
Step 5: Design with Smart Templates
The Smart Templates plugin allows you to generate dynamic, personalized content such as:- Transaction summaries
- Regulatory documents
- Customer notifications
Final recommendations
Once all systems are in place:- Review integration points between Midaz and each plugin.
- Create automated workflows combining ledger events, customer data, and fee logic.
- Apply permission rules using Access Manager to control access at scale.