
Midaz Authentication
Midaz emphasizes secure and efficient user authentication.
Midaz uses Casdoor for identity management and Casbin for fine-grained authorization. These tools provide a robust, flexible security infrastructure suitable for various project requirements.
Authenticating using Postman
Midaz offers seamless authentication through OAuth 2.0, supported by a Postman collection. This collection simplifies token generation for methods like Authorization Code, Client Credentials, Implicit Grant, and Refresh Token flows.
Note
Refer to Postman’s documentation to learn more about importing collections.
Standard Users
Midaz provides default users with varied roles and permissions to streamline testing:
| Role | Permission | Users |
|---|---|---|
| Admin | Full access to all HTTP and gRPC endpoints. | user_john |
| Developer | Permission to perform GET, POST, UPDATE, and PATCH operations on HTTP endpoints. | user_lisa |
| GRPC | Permission to call all mapped gRPC methods. | user_bob user_lisa |
| User | Read-only access (GET) to HTTP endpoints. | user_kate user_mikemike |
Default password
The default password for all users is Lerian@123.
Additional accounts can be created via the Casdoor Signup page or through API endpoints available in Swagger.
Casdoor Documentation
For more information about managing users in Casdoor, refer to the official Casdoor documentation .
Steps to Authenticate Using Postman
1. Import the Postman Collection
- Download the Postman collection.
- Import it into Postman via the Import button in the toolbar.
Attention
To generate an access token, the authentication module must be running. To ensure the module is up, follow the steps on the Midaz Setup page.
2. Generate an Access Token
- From the main Midaz page in Postman, go to the "Authorization" tab.
- On the Authorization tab, scroll all the way down and click the "Get New Access Token" button (figure 1).
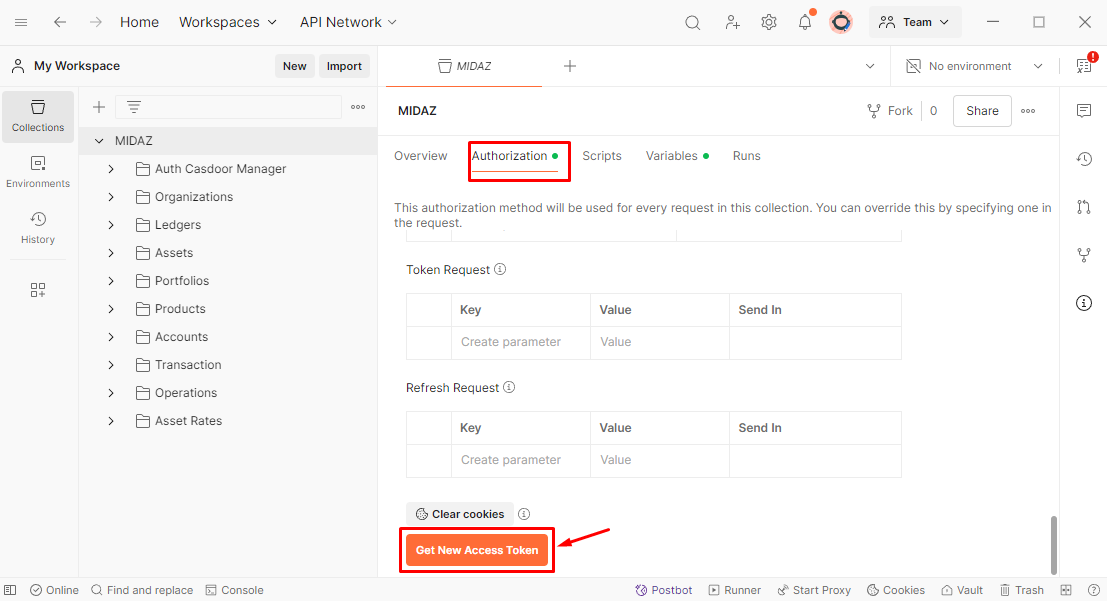
Figure 1. Button at the end of the page to generate a new access token.
- A window will open for you to log in using the credentials of one of the users available.
- Once the token is created, a success message will be displayed.
- Click on the "Proceed" button to continue or wait for the message to close.
- The "Manage Acess Tokens" window will open.
- From there, click the "Use Token" button.
- The generated token will be stored in the Current Token section of the Midaz overview page, and you can select it for future use. The token expiration date will also be displayed (figure 2).
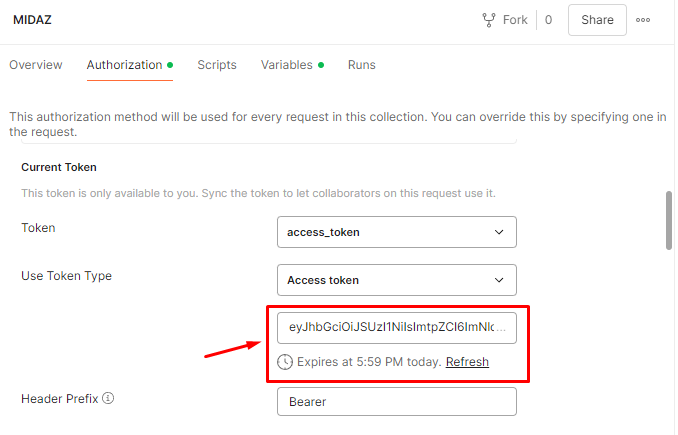
Figure 2. Information about the current token in the Midaz overview page.
- Send a request to one of the endpoints in the collection to save the token to the "
access_token" environment variable, which will be used in the endpoint call.- The response may display an error, but that is expected as its purpose is to save the token.
- Once saved, the token will be available to use in subsequent requests.
For a walkthrough, watch our video tutorial.
Verifying Token Authenticity
To verify the authenticity of a token, follow these steps:
- Ensure the authentication module is running (follow the setup guide on the Midaz Setup page if needed).
- Open the Postman collection.
- Send a request to the Verify Token endpoint.
- Populate the "
access_token" environment variable with the token to be verified. - The response will include a field named
active, which indicates whether the token is valid or expired.
Updated 2 days ago